Can You Put Led Lights on Wood
Have you considered giving a warm, glowing touch to your wooden surfaces with LED lights? The question arises: Can you actually put LED lights on wood? This guide is here to walk you through Can You Put Led Lights on Wood and the process, ensuring you understand every step and precaution necessary to achieve this attractive combination safely and effectively.

Whether it’s about accentuating your wooden furniture or adding a cozy ambiance to wooden walls, let’s dive into how you can bring this illuminating idea to life.
Understanding Wood as a Surface for LED Lights
Wood, with its natural charm and distinct texture, pairs wonderfully with LED lights. This combination is not only visually appealing but also practical. Unlike metal or plastic, wood is organic and slightly porous, affecting how it reacts to heat and adhesives.
Luckily, LED lights are known for their low heat emission, making them a safe and energy-efficient option for wood surfaces. The soft illumination of LED lights can enhance the wood’s natural grain, creating a warm and inviting ambiance.
Whether it’s for a bookshelf, a wall panel, or furniture, LED lights can transform the appearance of wooden items in your home. It’s important to consider the type of wood, as different varieties may interact with the lights in unique ways. Testing a small area first is always a wise step.
This harmonious blend of wood and LED lighting is not just about aesthetics it’s a practical, safe choice for adding a cozy touch to your living spaces.
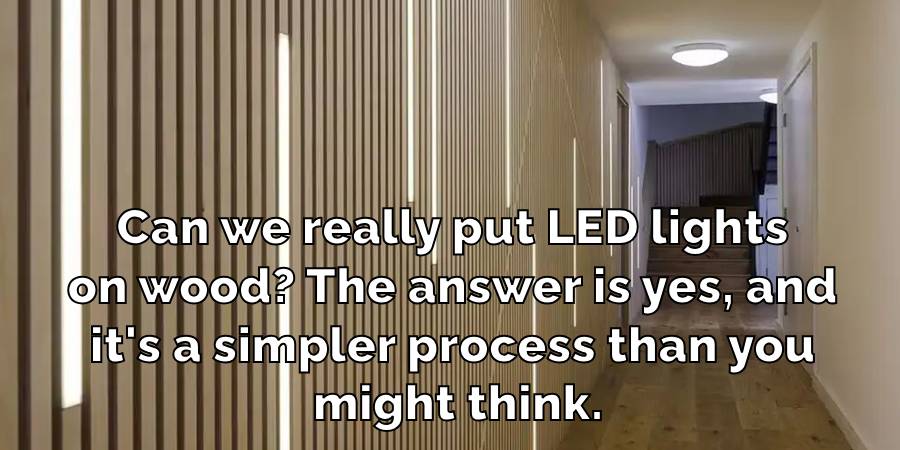
Can You Put LED Lights on Wood
It’s a question many of us ponder: Can we really put LED lights on wood? The answer is yes, and it’s a simpler process than you might think.
LEDs are a snug fit for wood, not just because they’re miserly on heat output but also for their stinginess with electricity. Imagine the serene glow they can cast on your oak bookcase or that rustic pine headboard, not just highlighting but enlivening the wood’s innate splendor.
Now, if you’re thinking of dressing up your timber in LED finery, here’s a nifty guide. Firstly, LED strip lights are your go-to. These versatile strips can be customized to fit just about any wooden marvel, from shelves to artwork. And with LED strip light installation, the process is straightforward.
Your toolkit? Just some double-sided tape or, for the more rugged outdoor spaces, double-sided foam tape to ensure those lights stay put through wind and weather.
But let’s talk about safety and efficiency because that’s where LEDs shine. They’re cooler than old-style bulbs, which means you’re sidestepping the risk of fires even with prolonged exposure to wooden surfaces.
Plus, the wattage for bulbs is a relic of the past with LEDs; we’re talking energy for light without the heat.
For those dimmable lights, adding a dash of ambiance or brightness is a mere switch away. And when it comes to installation methods, expertise in LED lighting isn’t a must. The ease of installation is a real boon.
Yet, for complex installations or where wiring issues may arise, roping in a project manager or someone with adhesion to metals and woods expertise might be wise.
Speaking of sticking to things, let’s chat about suitable adhesives. Double-sided tape is usually sufficient, but the choice of adhesive is crucial. You’ll want to pick adhesives that won’t give up the ghost after a few months.
For wooden surfaces, adhesive choices range from simple tape for indoor applications to more robust options for the great outdoors.
LEDs are indeed safe for use on wood, but ensuring a successful installation involves picking the correct type of LED strip lighting. Look for certified products – the product label should speak volumes about its quality and compatibility with your power supply.
Remember, lighting isn’t just about bright lights; it’s about the right lights. Commercial LED strip lights offer a range of options for different settings, from cozy indoor nooks to sprawling outdoor areas.
When it comes to prolonging the life of your LED setup, choosing a compatible power supply and checking for certifications can save you a lot of headaches down the line.
Decking out your wooden wonders with LEDs isn’t just feasible it’s a stroke of genius. It combines the timeless appeal of wood with the modern efficiency and safety of LED lighting. Whether it’s for enhancing the mood, highlighting textures, or simply adding a touch of brilliance, LED lights and wood are a match made in design heaven.
So, go ahead, let your light shine on those wooden surfaces, and transform your space into a beacon of warmth and beauty.
Preparatory Steps Before Installing LED Lights on Wood
Are you ready to add some sparkle to your wood with LED lights? Let’s get everything set up right. The key to a successful LED light installation on wood is all in the preparation.
- Clean the Wood Surface: Start by making sure your wooden surface is spotless. Use a clean cloth to wipe away any dust, dirt, or grease. A smooth, clean surface is essential for the LED lights to stick properly.
- Dry the Surface: If you’ve used any cleaning solution, let the wood dry completely. Any moisture can interfere with the adhesive on the LED lights.
- Light Sanding (If Necessary): If your wood surface is a bit rough, take some sandpaper and gently sand it down. This creates a smoother surface, which helps the lights adhere better and more evenly.
Remember, these steps aren’t just about sticking LED lights onto a piece of wood. They are about ensuring that the lights stay put and look great. By cleaning and preparing the wood properly, you’re setting the stage for a beautiful and lasting display.
Taking these simple yet effective steps ensures that your LED lights will not only look fantastic on your wooden surface but will also be secure and durable. It’s all about paying attention to the little details for the perfect finish.
Tools You Will Need
It’s like gathering all the ingredients before you start cooking – it makes the whole process smoother and more enjoyable. Here’s what you’ll need to get started on your LED light project:
- LED Strip Lights: These are your main ingredients. Choose the length and color that best fits your project.
- Power Source: This could be a battery pack or a plug, depending on where you’re installing the lights and what’s available.
- Measuring Tape: To measure the wood surface and the LED strips, ensure you cut the right length.
- Scissors or Cutting Tool: For cutting the LED strips. Make sure they’re sharp for a clean cut.
Remember, the right tools are not just about making the job easier. They’re about getting it done right. Using the correct tools ensures that your LED lights are installed neatly and function well.
Installation Process
Adding LED lights to your woodwork is like giving it a new lease of life. But how do you do it? Don’t worry, it’s easier than it sounds. Here’s a step-by-step guide to ensure you get it right:
Measure and Cut
First things first, let’s get the size right. Use your measuring tape to determine the exact length of the LED strip you’ll need for your wooden surface. Once you have the measurements, use your scissors or cutting tool to carefully cut the LED strip.
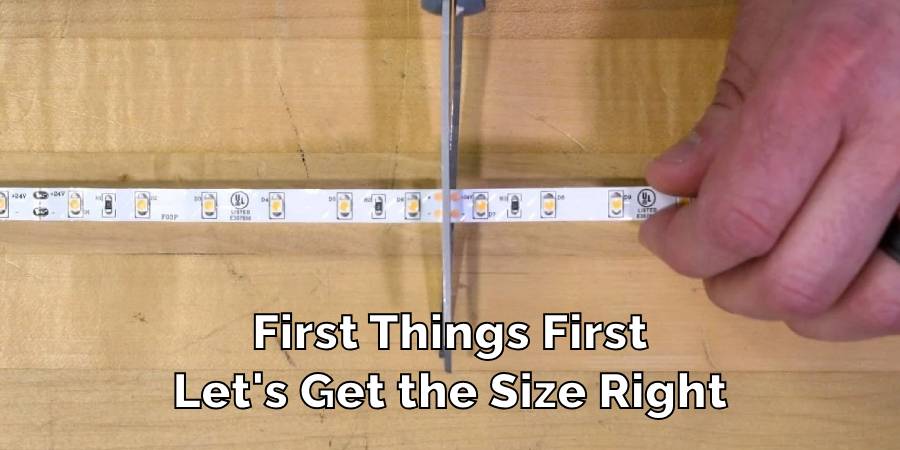
There are designated cut marks on the strip – make sure you cut only at these points to avoid damaging the lights.
Test the Lights
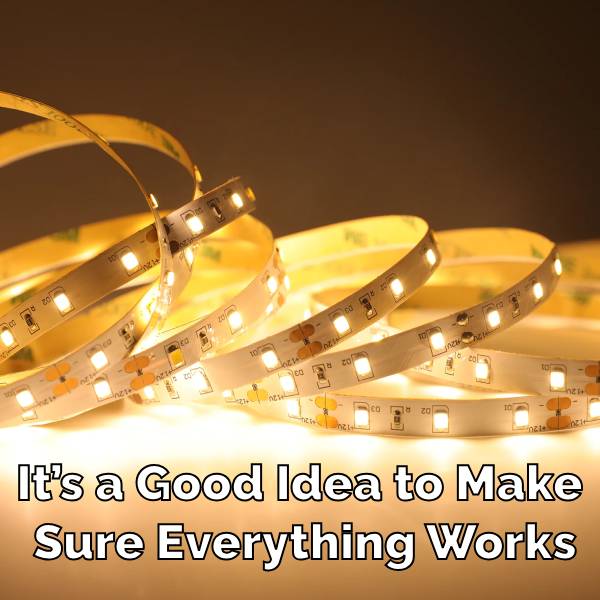
Before you attach anything, it’s a good idea to make sure everything works. Connect the LED strip to your chosen power source. This is your moment to check if all the lights are functioning properly. It’s much easier to solve any issues now than after the lights are already attached to the wood.
Peel and Stick
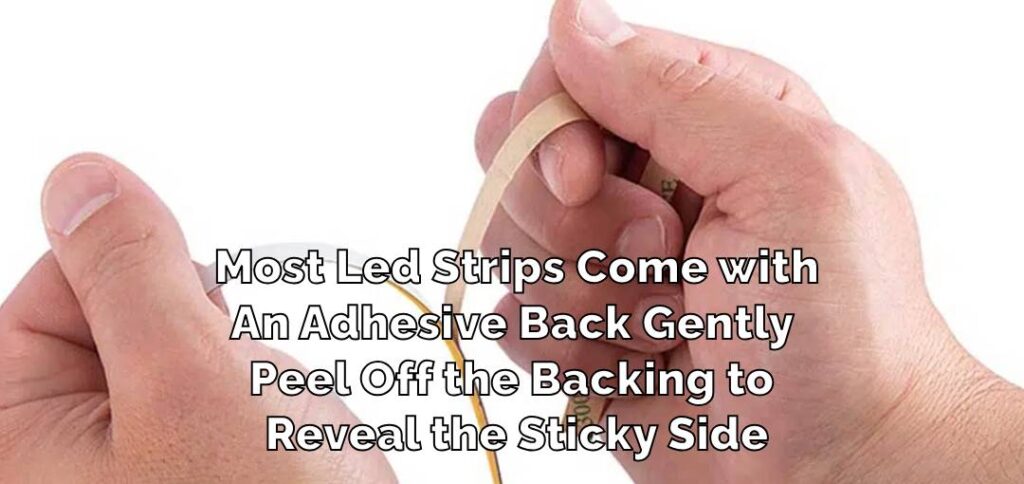
Now for the fun part! Most LED strips come with an adhesive back. Gently peel off the backing to reveal the sticky side. Carefully align the strip on the wood where you want it, and then press it down.
Apply even pressure along the length of the strip to ensure it sticks firmly and uniformly. This step is crucial – a well-attached strip means your lights won’t just look great, but they’ll also stay put for longer.
Remember, patience is key during installation. Take your time to measure, test, and stick. This isn’t just about putting lights on wood it’s about creating a space that feels uniquely yours.
Troubleshooting Common Issues
Sometimes, after installing LED lights on wood, you might run into a few hiccups. It’s normal, and most of the time, these issues are easy to fix. Here’s how you can troubleshoot them step by step:
Check for Loose Connections
- If your lights are flickering, the first thing to do is check the connections. Ensure that the LED strip is securely connected to the power source. A loose connection can disrupt the electricity flow, causing the lights to flicker.
Secure the LED Strip to the Wood

- Make sure the strip is firmly attached to the wood. If it’s peeling off or not sticking properly, it can cause interruptions in lighting. Press down along the strip to reaffirm its adhesion to the wood surface.
Inspect for Bends or Twists
- Look for any sharp bends or twists in the LED strip. Although these strips are flexible, excessive bending or twisting can damage the internal wiring. Gently straighten out any severe bends to see if this resolves the issue.
Remember, dealing with LED lights is all about a gentle touch. Avoid pulling or bending the strip forcefully, as this might cause more damage. Most of the time, a careful and patient approach can fix these common issues.
Safety Precautions
When you’re working with LED lights on wood, safety is key. Even though LED lights are generally safe, they are still electrical devices, and it pays to be cautious. Here are some straightforward safety tips to keep in mind:
Disconnect the Power Source
Before you start installing or adjusting your LED lights, make sure to disconnect them from any power source. This is a basic but vital step to prevent any electrical shocks or accidents.
Avoid Overlapping LED Strips
When laying out your LED strips, make sure they don’t overlap. Overlapping can cause the lights to heat up more than they’re supposed to, leading to unnecessary heat buildup. Keep the strips flat and separate to ensure they stay cool.
Handle with Care
Remember that LED strips are delicate. Handle them gently to avoid damaging the wiring. This is not just a safety measure but also helps in maintaining the longevity of the lights.
Check for Damaged Wires
Before installation, inspect the LED strips for any exposed or damaged wires. Using damaged lights can be risky and could lead to electrical hazards.
Follow the Manufacturer’s Instructions
Every set of LED lights comes with specific instructions from the manufacturer. Make sure to read and follow these guidelines for the best and safest installation.
Consider the Environment
If you’re placing LED lights in an area exposed to moisture, like near a kitchen sink or in a bathroom, ensure that the lights are suitable for such conditions to avoid electrical risks.
By following these simple yet effective safety measures, you can enjoy your LED-lit wooden surfaces without worry. Safety might seem like a small part of the process, but it’s the foundation that ensures everything runs smoothly and securely.
FAQ’s
Is it safe to put fairy lights on wood?
Yes, it’s usually quite safe. Fairy lights are known for their low heat output, making them a suitable choice for wood. However, it’s important to ensure the quality of the lights is good. Cheaper, lower-quality lights might not be as safe.
Also, it’s wise not to leave these lights on for too long, especially when you’re not around. Just like any electrical item, it’s better to be cautious and turn them off when they’re not needed.
Can you put LED lights on furniture?
Absolutely! LED lights are a fantastic way to give your furniture a new and exciting look. They’re safe as they don’t produce much heat, but proper installation is key. Ensure the lights are securely attached and that the wires are neatly managed to avoid any accidental damage or tripping hazards.
Do LED strip lights get hot enough to start a fire?
Generally, no. LED lights are designed to be much cooler than traditional bulbs. They’re a safe choice for most uses, including on wood, because they don’t reach high temperatures. However, it’s always good practice to follow safety guidelines, like not covering the lights and avoiding direct contact with very flammable materials.
Do LED lights get hot?
Compared to traditional lighting solutions, LED lights generate significantly less heat. This makes them a safer option for various uses, including on wood and fabric surfaces. However, they do produce a small amount of heat, so it’s important to ensure they have some space for air circulation and are not completely enclosed.
Where should you not use LED lights?
There are a few places where it’s best to be cautious with LED lights. Avoid using them in areas with a lot of moisture, like bathrooms or outdoors without proper weatherproofing, unless they’re specifically rated for such conditions.
Also, it’s not a great idea to place them near flammable materials or in tightly enclosed spaces where heat can’t dissipate effectively. Always consider the environment where you’re planning to use LED lights to ensure safety and longevity.
Conclusion
Bringing LED lights onto wooden surfaces is more than just a decorative choice it’s about blending modern technology with the natural elegance of wood. With the right approach and safety measures, you can transform your wooden furnishings and spaces into enchanting areas.
By meticulously following the preparatory steps and carefully adhering to the installation process, you ensure that your LED lights not only enhance the beauty of your woodwork but also last for a long time. Safety should always be a priority to enjoy your beautifully lit wooden spaces without worries.
So, go ahead, and illuminate your place with LED lights and wood—a combination that offers both style and substance.
Read Also – How to Make LED Lights Brighter