How to Wire an LED Light Bar without a Relay
Wiring an LED light bar directly to your vehicle without a relay might seem a bit tricky at first, but it’s something you can do on your own with a little help. This guide is here to simplify the process and make it more accessible to you.
We’ll go through the basics of how to wire an LED light bar without a relay, providing clear and easy steps for you to follow. This way, you can set up your light bar efficiently and make sure it works perfectly, all without needing to dive into more complicated wiring setups or buying extra parts. So, let’s get started and learn how to connect your LED light bar directly in a straightforward way.
Why You Need to Wire LED Light Bar without Relay
Opting to wire an LED light bar without a relay comes with certain advantages. The primary benefit is simplicity. Without a relay, the wiring process is more direct and less complicated, making it accessible for beginners or those who prefer a minimalistic approach.

This method also reduces the number of potential failure points in the system, as relays can sometimes malfunction or require replacement. Furthermore, wiring without a relay can save space and time, as it eliminates the need to find a suitable location for the relay and wire it into the system.
It’s important to note, however, that this approach is best suited for light bars with lower power demands, as high-powered lights might require the additional stability and safety that a relay offers.
Tools We Need to Wire LED Light Bar without Relay
When preparing to wire an LED light bar without a relay, having the right tools at hand is crucial for a successful installation. Here’s a detailed list of what you’ll need:
- LED Light Bar: This is the primary component. Choose one that fits your vehicle’s specifications and lighting needs.
- Wiring Kit (Appropriate Gauge): A wiring kit includes all the necessary wires and connectors. The gauge, or thickness, of the wire should match the power requirements of your LED light bar to ensure safe and efficient operation.
- Fuse (Appropriate Amperage): A fuse is a safety device that protects your vehicle’s electrical system. Select a fuse with an amperage rating that matches or slightly exceeds the current draw of your LED light bar. This will prevent potential electrical hazards.
- Switch: This allows you to control the LED light bar. You can choose a simple on-off switch or opt for something more sophisticated with dimming capabilities, depending on your preference.
- Wire Stripper and Cutter: These tools are essential for preparing the wires. A wire stripper removes the insulation without damaging the wire, and a cutter is used to trim wires to the desired length.
- Crimping Tool: This is used to securely attach connectors to the ends of wires. A good crimp ensures a solid electrical connection.
- Electrical Tape or Heat Shrink Tubing: These materials are used for insulating connections and providing a professional finish. Heat shrink tubing is preferred for its durability and neat appearance.
- Screwdriver Set: Various screws might be involved in the installation process, especially when mounting the light bar and switch. A set of screwdrivers ensures you’re ready for any type of screw head.
- Multimeter (Optional, for Testing): Although not mandatory, a multimeter is handy for troubleshooting and ensuring all connections are correctly made. It can measure voltage, current, and resistance, which can help confirm that your installation is safe and functional.
Having these tools ready not only makes the installation process smoother but also ensures that your LED light bar is installed safely and functions as expected. Remember, the right tools can make a significant difference in the ease and success of your DIY automotive projects.
How to Wire an LED Light Bar without a Relay (12 steps)
Wiring an LED light bar to your vehicle without a relay is totally doable, especially if it’s a smaller one that doesn’t need a lot of power. Just remember, safety is key. Before you dive in, make sure your vehicle is off and the keys are out. Here’s a step-by-step guide to get you through:
Safety First
Before anything else, disconnect your vehicle’s battery. This means taking off the negative cable to avoid any electrical surprises.

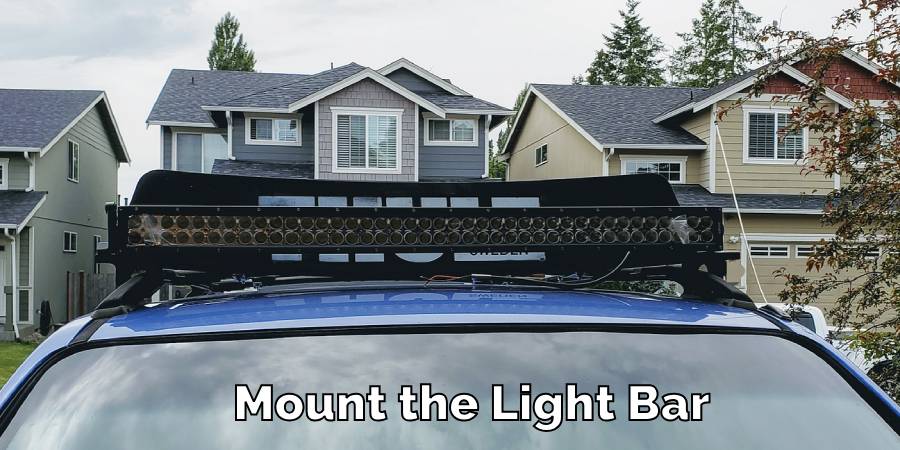
Mount the Light Bar
Pick where you want your LED light bar to go. Once you’ve found the perfect spot, secure it tightly to make sure it doesn’t move around when you’re driving.
Plan Your Route
Before you start laying wires, think about where they’ll go from the light bar to the battery and the switch. This helps keep things tidy and safe.
Prepare the Wiring Kit
Open up your wiring kit and check you’ve got everything: wires, connectors, a switch, and a fuse. Knowing what each part does makes the whole process smoother.

Connect to the Light Bar
Now, connect the wires to your LED light bar. Typically, this means attaching the positive (usually red) and negative (usually black) wires to their respective terminals on the light bar. Ensure these connections are tight and secure.
Run the Wires
Carefully route the wires from the light bar toward the engine bay. Be mindful to keep the wires away from any parts that get hot or move, like the exhaust or fan. Use cable ties or clamps to secure the wires along the way.
Install the Fuse
Insert the appropriate fuse into the wiring kit. This step is vital for protecting your vehicle’s electrical system from any overcurrent that could cause damage. The fuse acts as a safeguard, cutting off power in case of an electrical overload.
Connect to the Battery
Connect the positive wire from your wiring kit to the positive terminal of your battery. It’s important to ensure that this connection is not just tight but also clean, as a poor connection can lead to issues later on.
Ground the Light Bar
Find a good grounding point on your vehicle’s frame or engine bay for the negative wire. A solid ground connection is essential for the light bar to work correctly and safely.
Install the Switch
Choose a spot for the switch that’s easy for you to reach. Connect it to the wiring as per the instructions in your wiring kit. This switch will give you control over the light bar, allowing you to turn it on and off as needed.
Test Your Connections
Before you reconnect the battery, it’s wise to test your connections. Use a multimeter to check for any short circuits. This step ensures that everything is correctly wired and safe.
Finalize and Test
Once you’re confident in your connections, reconnect the vehicle’s battery. Now, it’s time to test the light bar. Turn on the switch and see if the light bar illuminates as expected. Make sure the switch effectively turns the light on and off.
And that’s it! You’ve successfully wired your LED light bar without a relay. It’s a great way to add something special to your vehicle. Just keep an eye on it and do regular checks to keep everything running smoothly. Enjoy lighting up your way!
Precautions While Wiring LED Light Bar without Relay
When you’re setting up your LED light bar without a relay, it’s important to take certain precautions to ensure a safe and effective installation. Here’s what you need to keep in mind:
- Disconnect the Battery First: This is the number one rule. Before you start any work, always disconnect the battery. This helps to prevent any electrical shocks or short circuits while you’re working. Simply remove the negative cable from the battery to cut off the power supply.
- Secure and Insulate All Connections: Make sure every connection you make, from the light bar to the battery and switch, is not only tight but also well insulated. Loose connections can lead to electrical failures, and poor insulation might cause short circuits. Using electrical tape or heat shrink tubing can provide good insulation.
- Be Careful with Wire Routing: As you lay out your wires, avoid areas that have sharp edges or get very hot, like the exhaust system. Sharp edges can cut or wear down the wire insulation, and hot surfaces can melt it, both leading to dangerous wiring problems.
- Use the Correct Fuse: Choosing the right fuse is crucial. It should match or slightly exceed the amperage draw of your LED light bar. This is a safety measure that protects your vehicle’s electrical system by breaking the circuit if there’s an overload, preventing potential damage.
- Regularly Inspect the Wiring: Over time, wires can wear out or get damaged. It’s a good practice to periodically check the wiring of your LED light bar. Look for any signs of wear, tear, or damage, and replace any compromised parts immediately. This helps in maintaining the safety and functionality of your light bar.
- Avoid Water and Moisture: While routing and securing the wires, ensure they are not exposed to water or moisture, which can lead to corrosion or electrical faults. If your light bar is likely to come into contact with water (e.g., during off-road driving), make sure all connections are watertight.
- Ground Properly: A proper ground connection is essential for the light bar to function safely. Always connect the negative wire to a solid grounding point on the vehicle’s frame or engine bay. Bad ground can lead to erratic light bar operation or even electrical issues in your vehicle.
- Test Before Final Assembly: Before you finish up and put everything back together, do a test run. Check if the light bar lights up and switches off as expected. This will help you catch any issues early and fix them before they become bigger problems.
Following these precautions can help ensure that your LED light bar installation is not only effective but also safe for both you and your vehicle. Remember, taking your time to do things right is always better than rushing and facing issues later.
FAQ’s
Can You Wire an LED Light Bar Directly to the Battery?
Yes, you can wire an LED light bar directly to your vehicle’s battery. This approach involves connecting the positive wire of the light bar to the positive terminal of the battery and grounding the negative wire to the vehicle’s frame.
However, it’s crucial to include an inline fuse in this setup. The fuse acts as a safeguard, protecting your vehicle’s electrical system from any potential overcurrent that could cause damage. This method is generally preferred for simpler or less powerful lighting setups.
Do You Need a Relay Switch for LED Lights?
Using a relay switch for LED lights is not always necessary, but it can be beneficial, especially for higher-powered lights. A relay helps manage the power demand of the light bar, reducing the load on the switch and preventing potential overheating.
For smaller, less powerful LED lights, you might opt to wire them directly without a relay. It’s about balancing ease of installation with the power needs of your light bar.
Do I Need a Resistor for an LED Light Bar?
Resistors are typically used with LED turn signals to prevent hyper flashing, not with LED light bars. An LED light bar usually doesn’t require a resistor if it’s functioning correctly and not causing any issues with your vehicle’s electrical system.
If you encounter problems like flickering or dimming, it’s more likely related to the power supply or wiring rather than the need for a resistor.
Do I Need to Put a Relay on My LED Headlights?
While not always essential, using a relay for LED headlights can be a good idea, particularly for models with higher power requirements.
A relay can provide better power management, ensuring that your headlights work efficiently without putting too much strain on your vehicle’s electrical system. It also adds an extra layer of protection, as the relay can prevent overheating and potential damage to the switch or wiring.
What Happens if a Relay is Not Used?
If you don’t use a relay for your LED light bar or headlights, the entire electrical load is handled directly by the switch and the vehicle’s wiring. This setup can be fine for light bars or headlights that have a low-power draw.
However, for higher-powered lights, not using a relay might overburden the electrical system, potentially leading to overheating issues, switch failure, or even damage to the wiring. A relay helps to distribute the electrical load and can extend the lifespan of your LED lighting system.
Conclusion
Wiring an LED light bar without a relay is a viable option for those looking for a simpler, more direct installation. This method is particularly suited for light bars with lower power requirements. By following the steps outlined, you can achieve a safe and effective installation.
Remember to prioritize safety by using an appropriate fuse and ensuring all connections are secure. Regular checks and maintenance of your light bar wiring can further ensure its longevity and functionality.
Whether for aesthetic enhancement or practical illumination, mastering the art of wiring your LED light bar can be a rewarding endeavor.

How to Change a Light Switch without Turning Off the Power
Mastering the skill of changing a light switch without turning off the power holds great…

How To Stick LED Strip Lights On Wall Without Damaging Paint
LED light strips have surged in popularity, adorning homes and spaces with their vibrant colors…

Can Led Lights Get Wet
LED lights are everywhere, from homes to city streets, known for their efficiency and brightness….

Creative Ways to Use LED Strip Lights in Your Home
LED strip lights, those brilliant strips of technology, serve as a beacon of innovation in…

Can Solar Lights Catch Fire
Solar garden lights are your go-to pal for lighting up your backyard oasis while keeping…

What gauge wire for LED lights
When diving into LED lighting, one aspect that might not catch your eye at first…