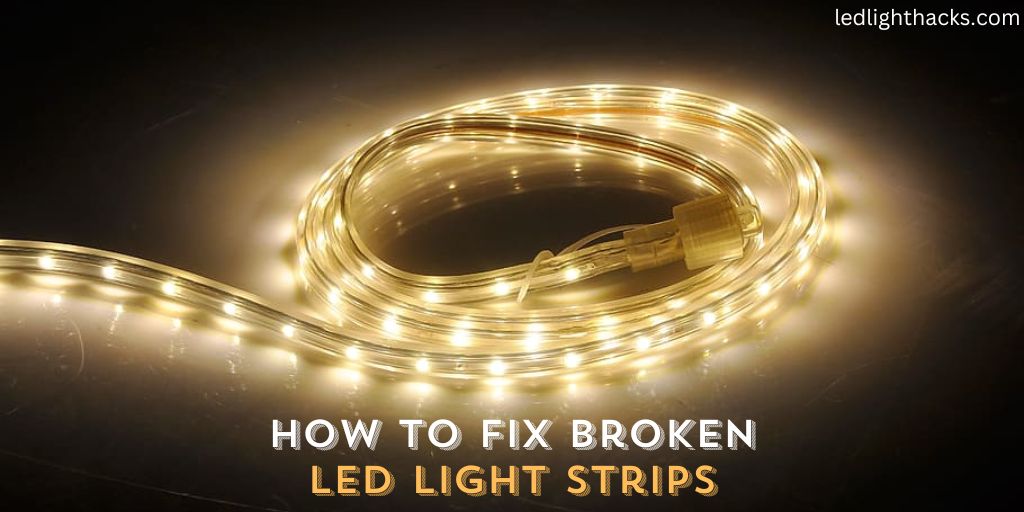
How to Fix Broken LED Light Strips
Today, I’m excited to share with you a straightforward guide on how to fix broken LED light strips. It’s a common scenario: you set up these amazing LED strips that illuminate your space just the way you like, and then, suddenly, they stop working. It’s disappointing, to say the least.
However, there’s good news. Repairing them might seem tricky at first, but it’s quite doable. With a handful of basic tools and some easy-to-follow steps, you can get your LED strips shining brightly again. In this guide, I’ll walk you through everything you need to know, step by step. By the end, you’ll be ready to fix those LED strips on your own, saving you both time and money.
Why You Need to Fix Broken LED Light Strips
Fixing broken LED light strips is not just about saving money it’s about reclaiming a part of your space that adds ambiance and character. Imagine your gaming room, your cozy reading corner, or your festive patio without the vibrant glow of LED lights – it just wouldn’t be the same.
Moreover, repairing LED strips is a green choice. By fixing them, you’re keeping electronic waste out of landfills and reducing your environmental footprint.
But it’s not just about the environment or aesthetics. It’s also about the satisfaction of fixing something with your own hands. There’s a unique sense of accomplishment in diagnosing a problem, finding a solution, and implementing it successfully.
It’s empowering and can even become a fun, rewarding hobby. So, let’s dive into the DIY LED light strip repair and bring back the light to our favorite spaces.
Tools We Need to Fix Broken LED Light Strips
You don’t need a whole toolbox, just a handful of specific items that will make this job a breeze. Think of these tools as your trusty sidekicks in this DIY adventure.
- Soldering Iron: This is your main hero. It’s what you’ll use to join everything together neatly. Don’t worry if you’ve never used one before it’s simpler than it sounds.
- Solder: Think of this as the glue that holds your connections together. You don’t need much, just a small reel will do.
- Wire Cutters: These are for snipping and trimming. You’ll want to cut out the bad parts of the LED strip, and these will give you a clean cut.
- Heat Shrink Tubing or Electrical Tape: Safety is key. After soldering, you’ll use these to insulate the connections, keeping everything safe and tidy.
- A Multimeter: This handy device helps you figure out where the problem is. It’s like a detective tool for electronics.
- Scissors: For when you need to cut the LED strip or trim something small. Regular household scissors are just fine.
- A Clean Workspace: Last but not least, you need a good, clean area to work. A clear table or desk is perfect. You want enough space to spread out and see everything.
So, there you have it – your essential toolkit for fixing those LED light strips. With these tools at your side, you’re all set to tackle the job like a pro. Remember, the right tools don’t just make the job easier they make it possible. Now, let’s get fixing!
How to Fix Broken LED Light Strips (10 steps)
Let’s get down to fixing those LED light strips. This might seem a bit technical, but I’ll break it down into simple steps. You’ll be a pro in no time!
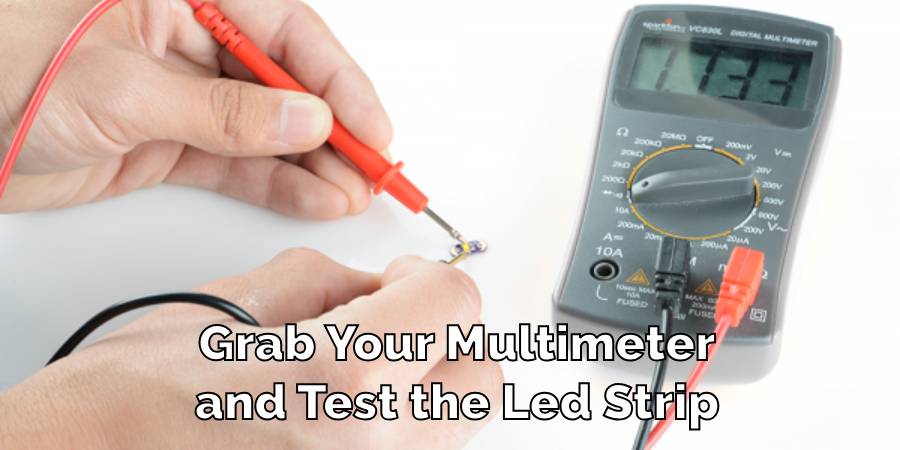
Identify the Problem
First up, let’s play detective. Grab your multimeter and test the LED strip. Is it just one pesky LED not lighting up, a whole section, or the entire strip? This step is crucial because it tells you exactly where the issue is. Think of it as finding the ‘ouch’ spot.
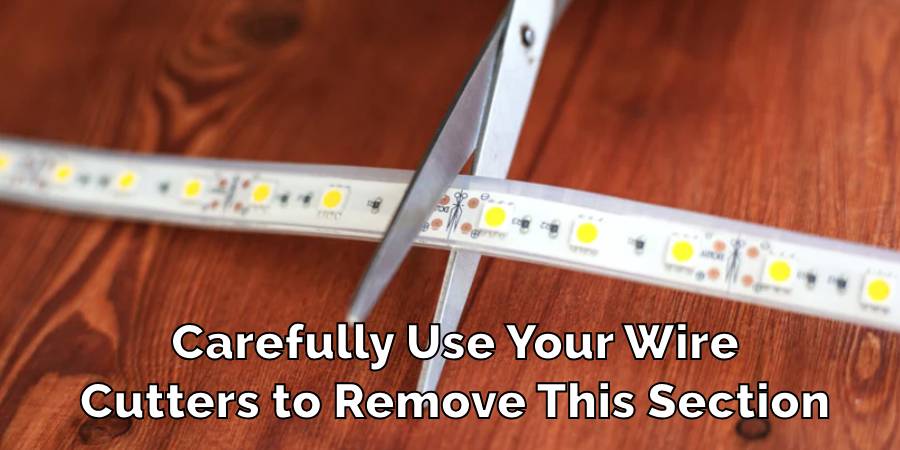
Cut Out the Damaged Section
Found the troublemaker? Great! Now, carefully use your wire cutters to remove this section. Look for the small scissors icons on the strip they show you where it’s safe to cut. This precision ensures you only remove the bad parts and keep the good.
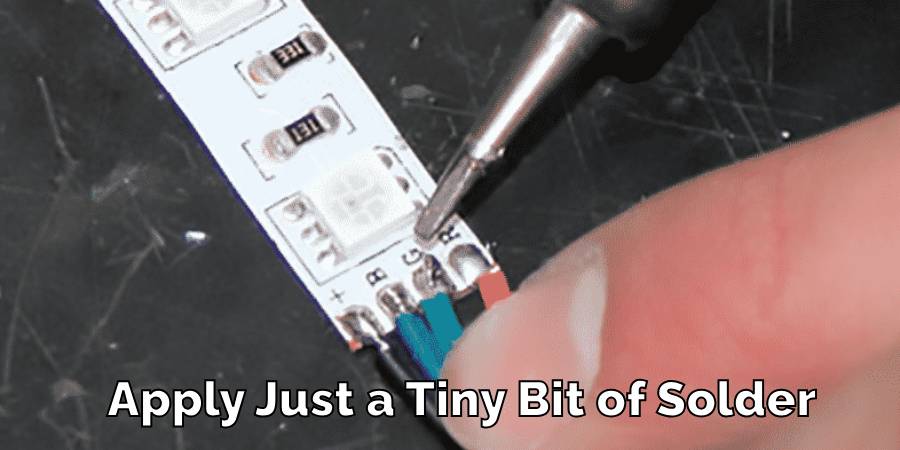
Prepare the Strip Ends: After cutting, you’ll see two ends with copper pads. Gently strip off a bit of the covering from these ends. Be careful here those copper pads are delicate and important for the next steps.
Tin the Pads
Now, let’s prepare these pads for soldering. Apply just a tiny bit of solder to them – this process is called ‘tinning.’ It preps the pads to make attaching new wires much easier and creates a better connection.
Prepare the Replacement Section
If you’re inserting a new section, cut a matching piece from a new LED strip. Just like before, tin the pads on this new piece too. It’s all about making those connections ready and raring to go.
Solder the Strips Together
Here’s the main event! Carefully solder the new section to the main strip. Remember, the positive (+) and negative (-) sides need to match up. Think of it like piecing together a puzzle everything has to fit just right.
Insulate the Connection
Safety time! Cover your newly soldered areas with heat shrink tubing or electrical tape. This step is crucial as it prevents any shorts and keeps the connection safe and sound.
Test the Connection
Moment of truth – test your strip. If the lights come on as they should, you’re on the right track. If not, recheck your soldering and connections. It’s all about trial and error.
Secure the Strip
Once you’re happy with the test, it’s time to put the strip back in place. Fix it firmly, but gently. You don’t want to put too much pressure on your newly fixed masterpiece.
Final Check
Lastly, give your strip one final test. Turn it on and check every part of it, especially the repaired section. Are all lights bright and shining? Congratulations, you’ve just fixed your LED strip like a champ!
And there you have it – from finding the problem to the final, triumphant lighting test. With these steps, you can tackle any issues your LED light strips throw at you. Remember, patience and careful work are your best friends in this DIY journey. Happy fixing!
Precaution While Fixing Broken LED Light Strips
Alright folks, before we dive into the fixing part, let’s have a quick chat about safety. When you’re dealing with electronics, especially when it involves soldering, being cautious is not just smart, it’s essential. Here are some key safety tips to keep in mind:
Unplug First
This one’s a no-brainer but super important. Always disconnect your LED strip from any power source before you start. It’s like crossing the road – better safe than sorry.
Respect the Heat of the Soldering Iron
Your soldering iron is going to get hot. And I mean hot enough to burn wood kind of hot. Always handle it with care, and when it’s not in use, make sure it’s resting in a safe place where it can’t fall or touch anything flammable.
Ventilation is Key
When you’re soldering, you’re going to create some fumes. They’re not the “take a deep breath and relax” kind. So, make sure you’re in a well-ventilated area or have a fan running. Fresh air is good, not just for you but for your project as well.
Gentle Does It
When you’re dealing with electronics, think of it as performing delicate surgery. Don’t force any components into place. If something isn’t fitting, there’s a reason. Take a step back, reassess, and try a different approach.
Keep Your Workspace Organized
A cluttered workspace can lead to accidents. Keep your tools in order and your working area clear. This not only prevents mishaps but also makes your repair work more efficient.
Wear Protective Gear
Consider wearing safety glasses to protect your eyes from any accidental splashes of solder or other debris. A pair of non-conductive gloves can also be a good idea, especially if you’re new to soldering.
Double-Check Before Powering Up
Once you’re done with your repair, before you plug it back in, give your work a once-over. Check that all connections are secure and properly insulated. Better to catch a mistake now than after you’ve turned the power back on.
Simple but crucial safety tips to keep in mind while fixing your LED light strips. Always remember, taking a few extra seconds for safety can save you a lot of trouble down the line. Safe fixing everyone!
FAQ’s
Can an LED Light Strip Be Repaired?
Definitely! With a few basic tools and a little patience, you can fix most problems with LED light strips.
Whether it’s a single LED not working, a section of the strip that’s gone dark, or even issues with the wiring, most of these can be tackled at home. It’s all about identifying the issue and applying the right fix.
What to Do if an LED Light Breaks?
If it’s just one LED that’s causing trouble, you’ve got a couple of options. You can either bypass the faulty LED or replace the entire section of the strip. Bypassing is simpler but replacing the section ensures more uniform brightness and color.
Can You Reattach LED Strips After Cutting?
Yes, you can! After cutting your LED strip, you can reconnect the pieces either by soldering them back together or using special connector clips designed for LED strips. Soldering provides a more permanent and sturdy connection, but connectors are great for a quick and easy fix.
Why Did My Led Lights Break?
LED lights are pretty sturdy, but they can still break. Common culprits include power surges, which can overload and burn out the LEDs, water damage, especially if your LED strip isn’t waterproof, and physical impact, like if something hits the strip. Sometimes, it’s just wear and tear or a manufacturing defect.
Can You Glue Led Strips?
You can use adhesive strips or mounting tape to stick LED strips to surfaces, which is great for installation. But remember, never use glue directly on the electronic components or the LEDs themselves. Glue can mess up the electrical connections and potentially cause more damage.
Conclusion
A complete guide on how to fix broken LED light strips. Remember, the key to success is patience and precision. Don’t rush the process take your time to ensure each step is done correctly.
This not only solves your current problem but also helps prevent future issues. So, next time your LED lights give out, don’t despair. With this guide in hand, you’re more than capable of bringing them back to life. Happy fixing!
How to Change a Light Switch without Turning Off the Power
Mastering the skill of changing a light switch without turning off the power holds great…
How To Stick LED Strip Lights On Wall Without Damaging Paint
LED light strips have surged in popularity, adorning homes and spaces with their vibrant colors…
Can Led Lights Get Wet
LED lights are everywhere, from homes to city streets, known for their efficiency and brightness….

Creative Ways to Use LED Strip Lights in Your Home
LED strip lights, those brilliant strips of technology, serve as a beacon of innovation in…

Can Solar Lights Catch Fire
Solar garden lights are your go-to pal for lighting up your backyard oasis while keeping…

What gauge wire for LED lights
When diving into LED lighting, one aspect that might not catch your eye at first…